
Processing drone images for QGIS
We have been on the new farm now for close to 2 years and we have been leveraging my Mavic Mini drone for a bunch of real-time activities like checking gutters, locating livestock and getting an understanding of how water flows in the Queensland storm season.
One thing that we have not been able to do is accurately use captured images for any surveying or planning of works on the farm, but as we are starting to get serious about the veg patch it seemed like a good excuse to work this out.
One of the first challenges is getting consistent tiles with the correct amount of overlay to allow for correction to map projection and matching to create an orthophoto mosaic.
These images are almost impossible to do through manual flight (I am certainly not skilled enough) so I used automated flight software to create photo capture missions. Sounds cool doesn’t it!
The platform I am leveraging is called Dronelink, I chose this platform for a number of reasons:
- It supported the Mavic Mini as not all platforms supported the sub 250g drones
- The solution was affordable for the hobbyist and had a clear progression path if I was to do more surveying outside of my personal property
- The platform was partially online, this allowed me to plan flight missions on my laptop and be able to get them to my tablet to run the automated flights
To plan a photo mission was as simple as selecting your start point, the area you want to capture and what height you would like to capture images from. This is done on a Google Maps like interface making area identification simple.
As the software is aware of the drone type and the height you will be capturing from it, it can calculate the flight path and the intervals it needs to capture images. This leaves you with a mission looking like this.
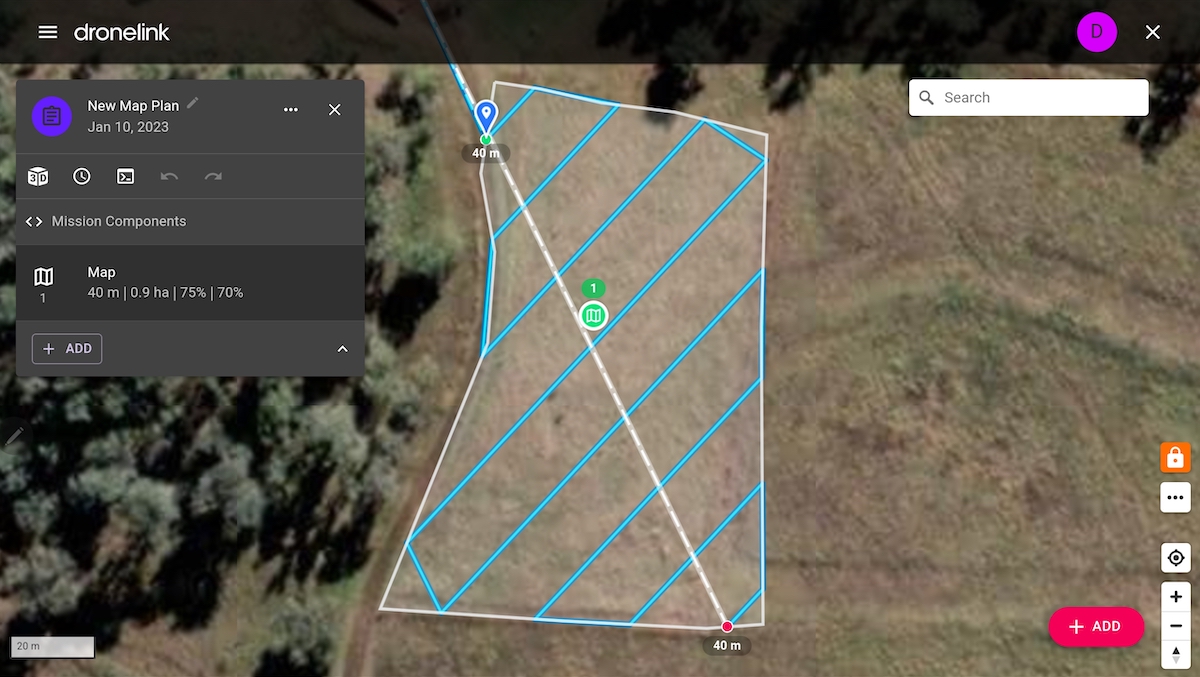
I planned this on my Macbook Air in the browser then executed the flight from my Samsung Tablet. I did need to be connected to the internet to run the flight plan, but I later found out you can Download it for offline use.
Once your flight is complete you have a bunch of photos from the flight on the SD card that you need to get over to your computer for processing. I am lazy with managing what is on the drone’s SD card so it can get confusing, so my tip would be to keep it organised to make the identification of images simple.
Now to get the images into QGIS so I can start to add geometries to begin the design of the veg patch.
First I looked for a QGIS native solution and came across the Vertical Photo Placer plugin, as I could only get the Quick View option working the view was not very accurate or clean as you can see here.
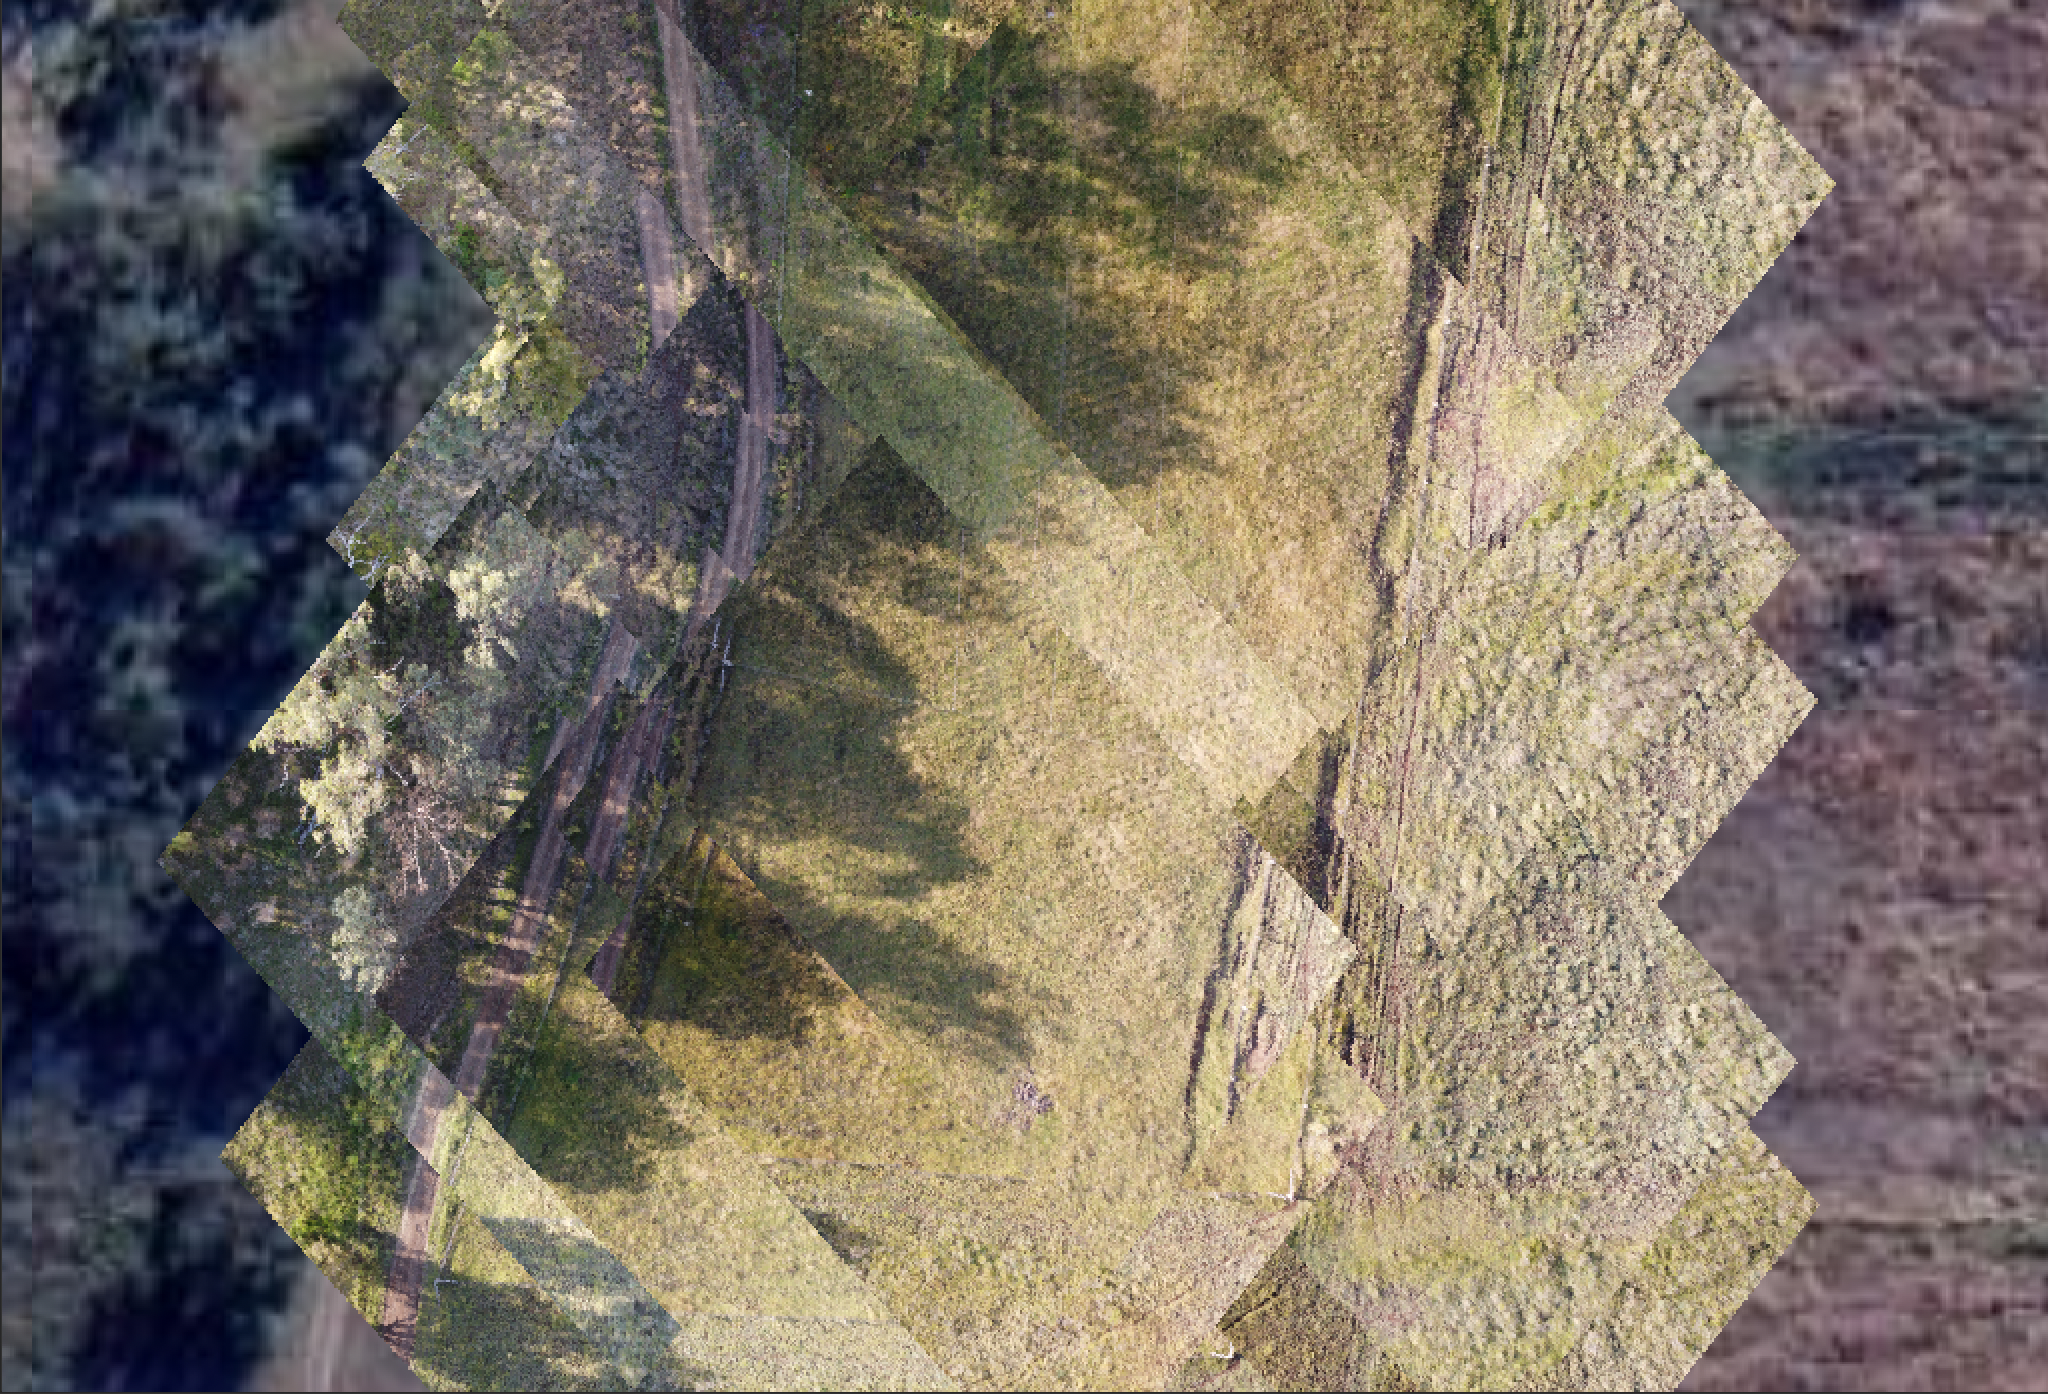
I would be keen to try the photo processing capability of this plugin, but I need to find the correct GeoTiff Topo data for that to work.
Where I settled was to leverage a dedicated processing suite and I came across the FOSS project OpenDroneMap, this is able to process drone-based image data to generate both 2D and 3D corrected images for use in mapping and GIS use cases.
Using ODM data processing tools from the command line is straightforward as it only requires getting a project base structure on your filesystem and then the execution of a podman command to kick off the processing.
To set up a project, all you need is to create a folder with a sub-directory called images. Then all of the drone’s images get moved into the images folder as this is where odm container workload will be expecting the images.
mkdir -p <project_dir>/images/
cp <path_to_images>/* <project_dir>/images/
The odm container will create the rest of the missing directories for the image correction and phot processing jobs it will perform.
To run the container in podman (This is my preference on M series Macbooks) you need to run the following command.
podman run -ti --rm -v ./Drone-Data/:/datasets opendronemap/odm --project-path /datasets home-farm
This is mounting ./Drone-Data/ on the machine to /datasets in the container opendronemap/odm.
As part of the execution we specify which project data is to be processed using --project-path /datasets home-farm, which is telling the odm job to use the project home-farm in the /datasets directory.
Now I had some challenges processing the 56 images from my veg patch survey on my Macbook Air. This was initially crashing the container job with OOM errors.
This turned out to be due to the podman virtual machine it runs on the mac not having enough memory allocated. This was easily corrected with the following commands.
podman machine stop
podman machine set -m 4096
podman machine start
This allocated 4GB of Memory to the podman machine and this corrected the issue. I also set the power setting on my Mackbook to not go to sleep which also seemed to help.
When the job is complete you will see the following.
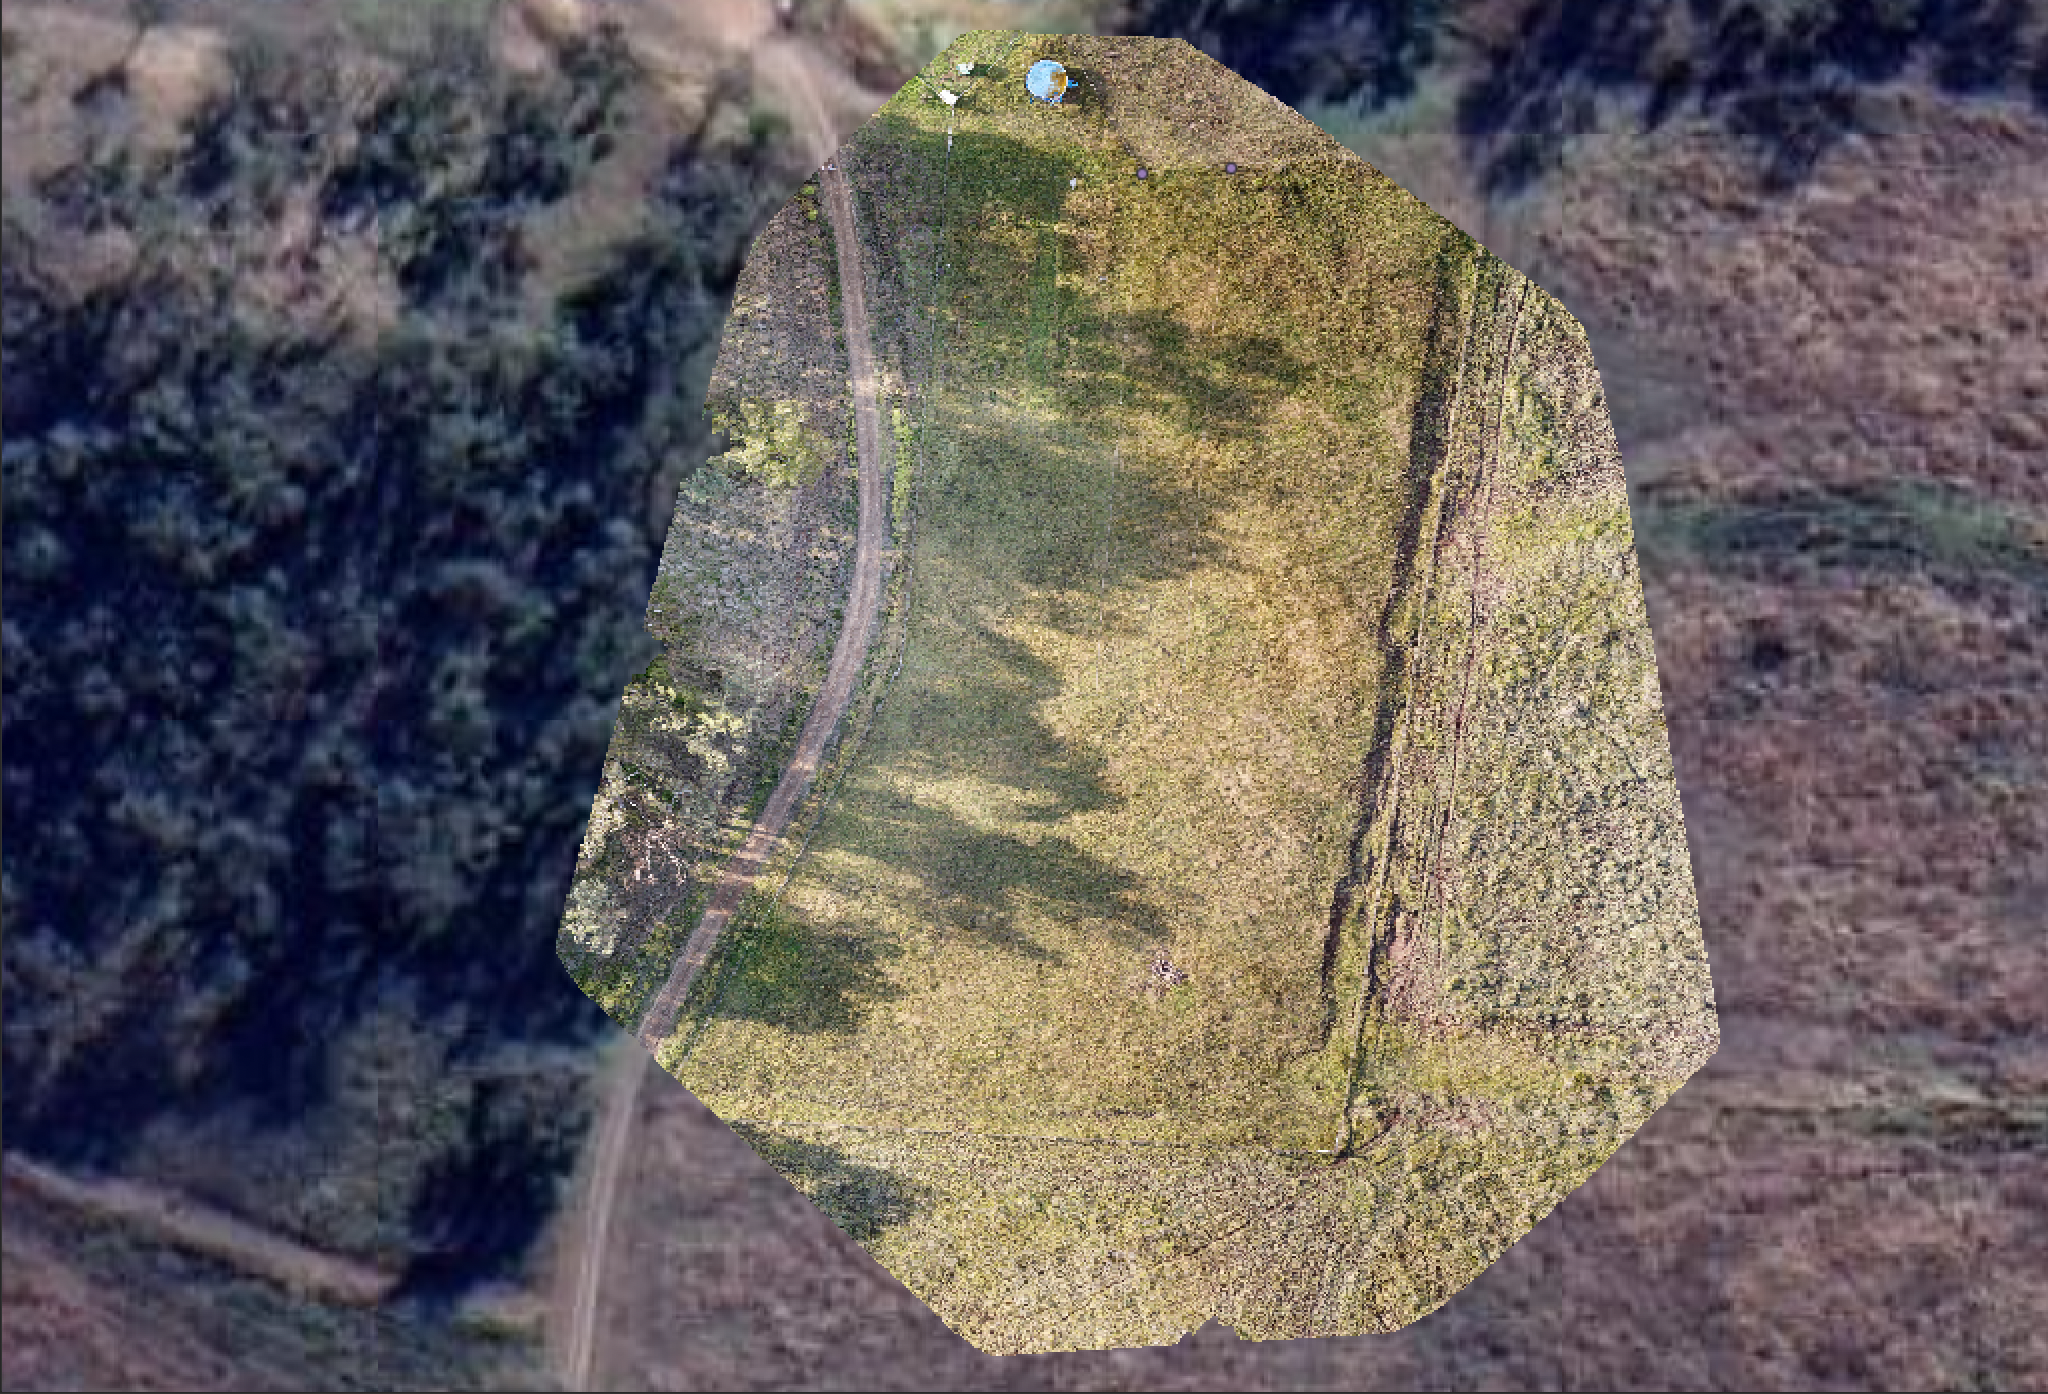
Now we just need to get the generated photomosaic into QGIS. This is done simply by adding a new Raster layer that references the file in the following path:
<path_to_project>/odm_orthophoto/odm_orthophoto.tif
This will then give you a base map that looks like the following.
Now it is just a matter of adding .shp vector layers to draw in the geometries for all of the features we are planning to add to this space like fencing, garden beds and a chicken coop.
This can all be done and georeferenced data captured to simplify the layout of areas once we are back in the paddock.
In the next post on this topic I will share how we take point and line data from the QGIS project and out to the paddock.