
Getting Starlink into the house on the cheap
When we made a move further out of town the options were limited for internet connectivity, so once we had a property address I signed up for the preorder of Starlink.
With all of the fun, the world has been having it took a while for our turn to get onto the service, but once we got the dish we have not looked back.
Initially, we used the warm weather to push the cable from the dish through the dog door which worked great while the door opened 24/7. Doing this was not ideal as we had a few uninvited guests come in through the gap and now we are into winter open doors for good internet are not a family favourite.
I looked at the Starlink wall cavity kit, but at 79 dollars I thought that I could put something together cheaper. Also with the introduction of roaming, it needed to be easily disconnected from the house.
My plan was a simple ethernet passthrough, from under the house (the house is on stumps) into the living room. This would also allow the cable to travel to where I am going to mount it on the roof easily as well.
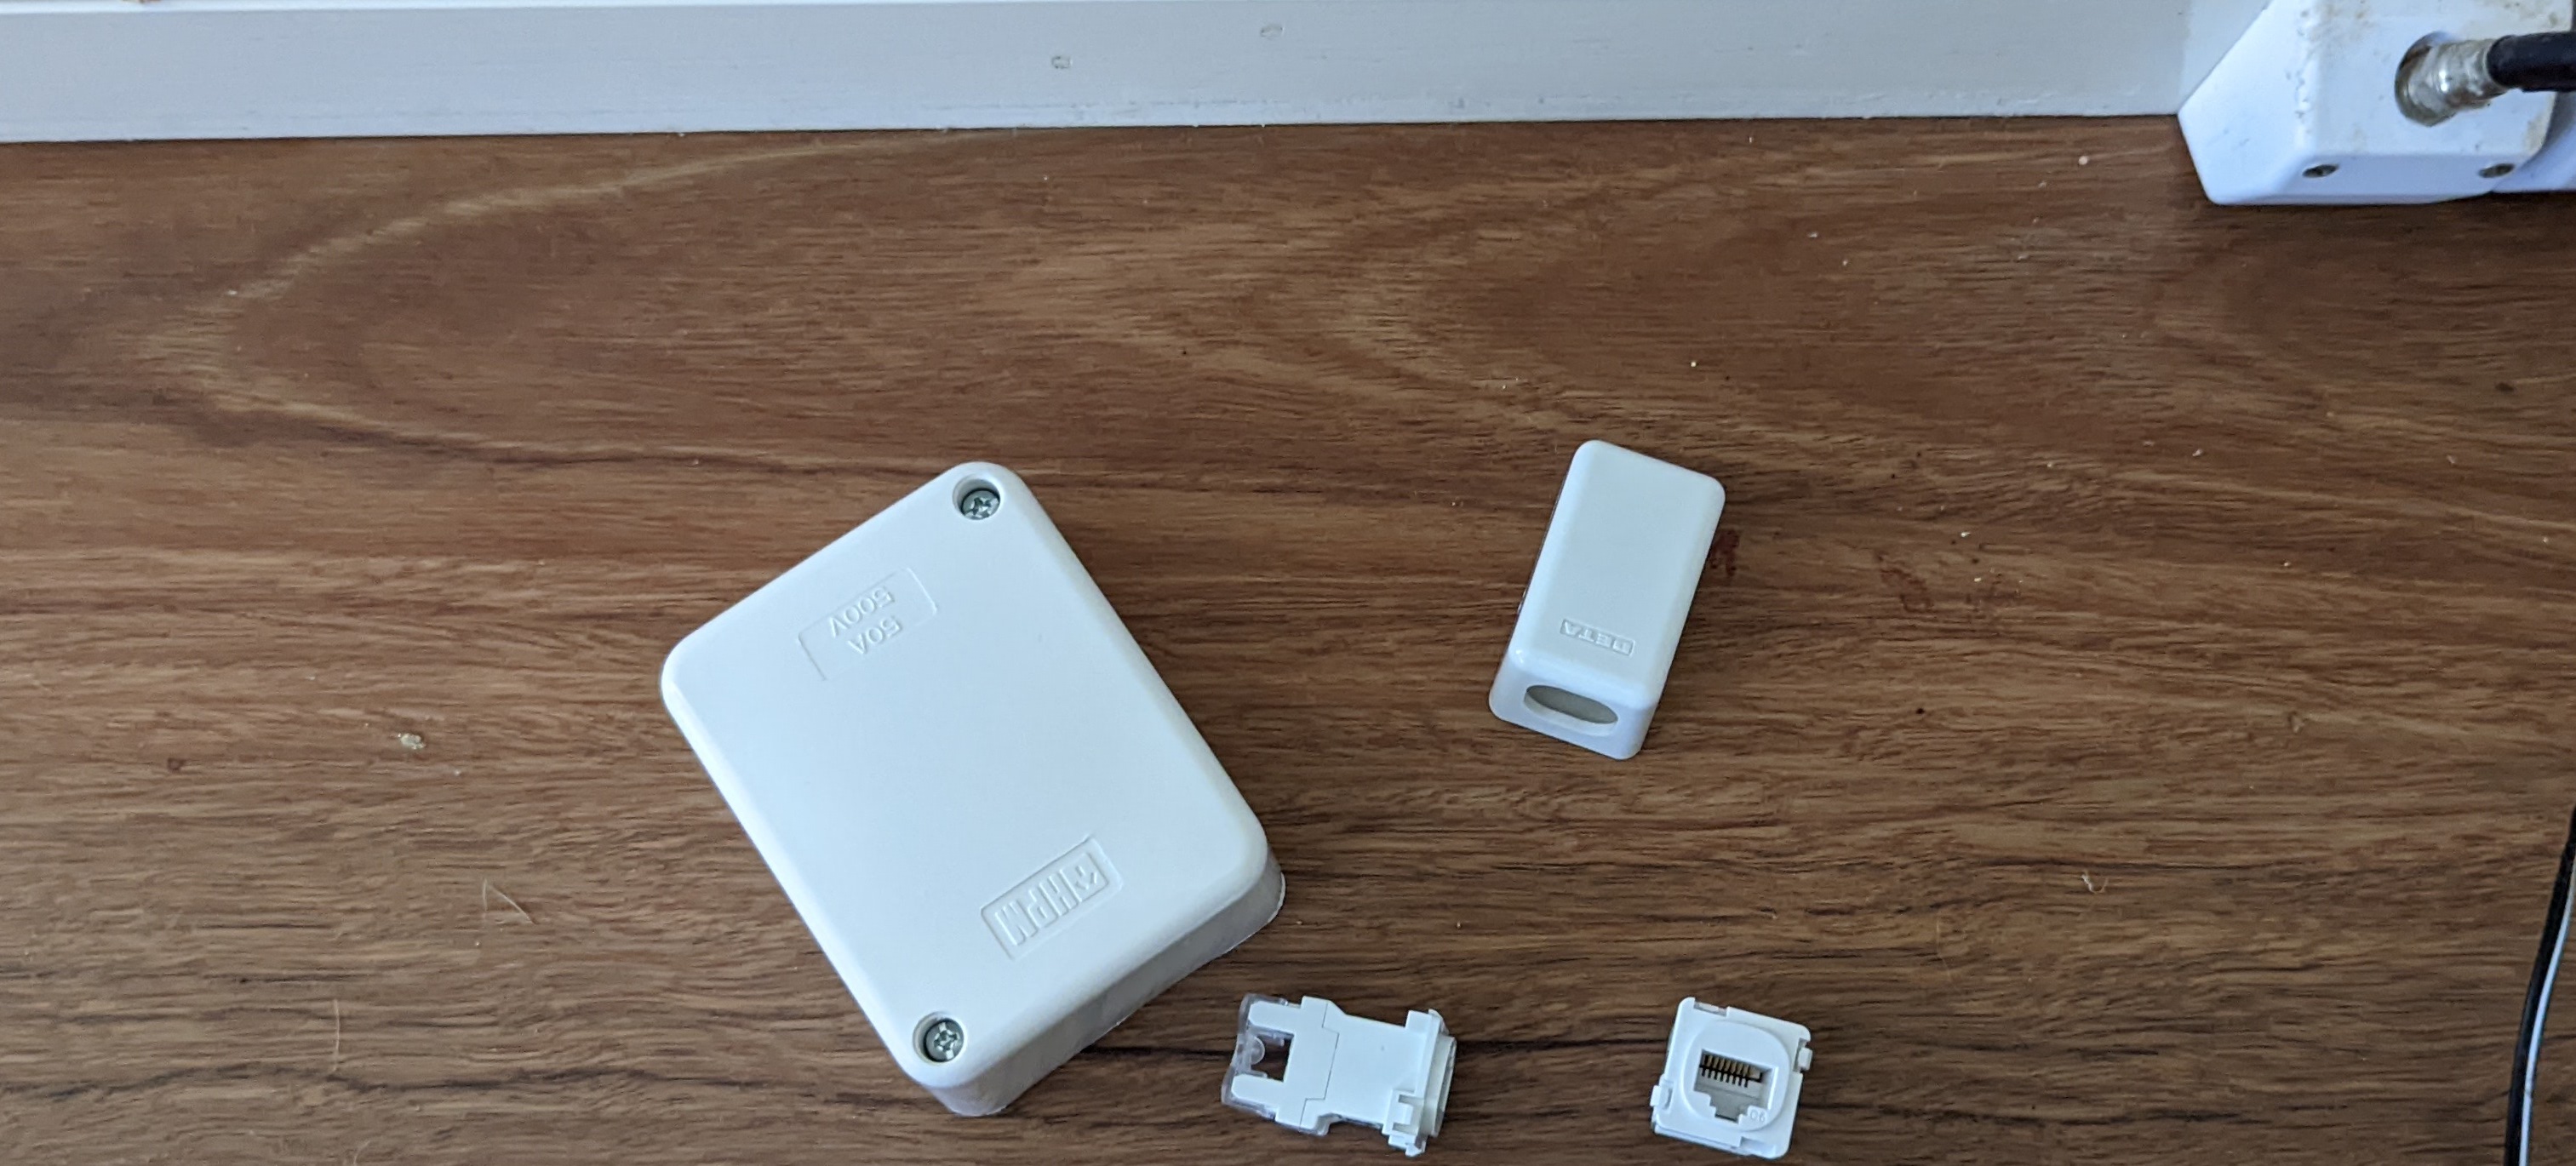
The first iteration was 2 RJ45 wall plate keystones, an architrave enclosure, a junction box and some Cat5e from a cable I had. This set me back $25 at Bunnings.
This was patched through using a straight-through pattern punching down each of the keystones with a T568A pinout at each end.
This provided connectivity, the Starlink app on my phone showed that the dish was connected, but my Nest router had no connection to the internet.
Needless to say, this caused a bunch of confusion as connectivity was there but the internet was not. After trying a bunch of cable combinations there was no result and removing the patch between the POE injector and the dish would restore connectivity to the internet.
So with the router delegated to outside a window and the internet restored it was research time.
There are 2 unique things with the POE implementation used by the Dishy. The first is that the Dishy uses 2 pairs for power injection (POE++ 802.3bt) and can draw up to 100W which has been confirmed by a bunch of users and confirmed in this Starlink engineers AMA.
So now I knew how it worked it was back to the internet to understand why my passthrough didn’t work. I didn’t find anything that said POE++ could not be deployed on Cat5e, but several things suggested that Cat6 may be the answer.
First, the grey cable from my Dishy (v1 round) had been identified by users as Cat6 on Reddit.
Also, reading about the difference between Cat5e and Cat6 is the conductors are larger in Cat6 reducing resistance and heat. The Cat6 cable also has pair shielding to reduce noise and crosstalk.
But what convinced me Cat6 was the answer was this blog post from Simon Hackett, while his issue was related to a bent pin guide on the supplied grey Dishy cable. The solution was a working example of what I wanted to do and Cat6 was the cable of choice.
So back to Bunnings I went and spent another $13 on a Cat6 patch lead and an RJ45 joiner. This allowed me to recreate the test in the post, this was successful.
With this working, I needed to be able to get the cable through the small in the floor. Knowing that the circuit is sensitive to loss I decided to only remove one end of the patch and feed this through to one of the RJ45 keystones I purchased earlier. Fortunately, these were Cat6 standard items.
This allowed the cable to pass through from outside to the house and mount in the architrave enclosure that I already had fitted to the wall.
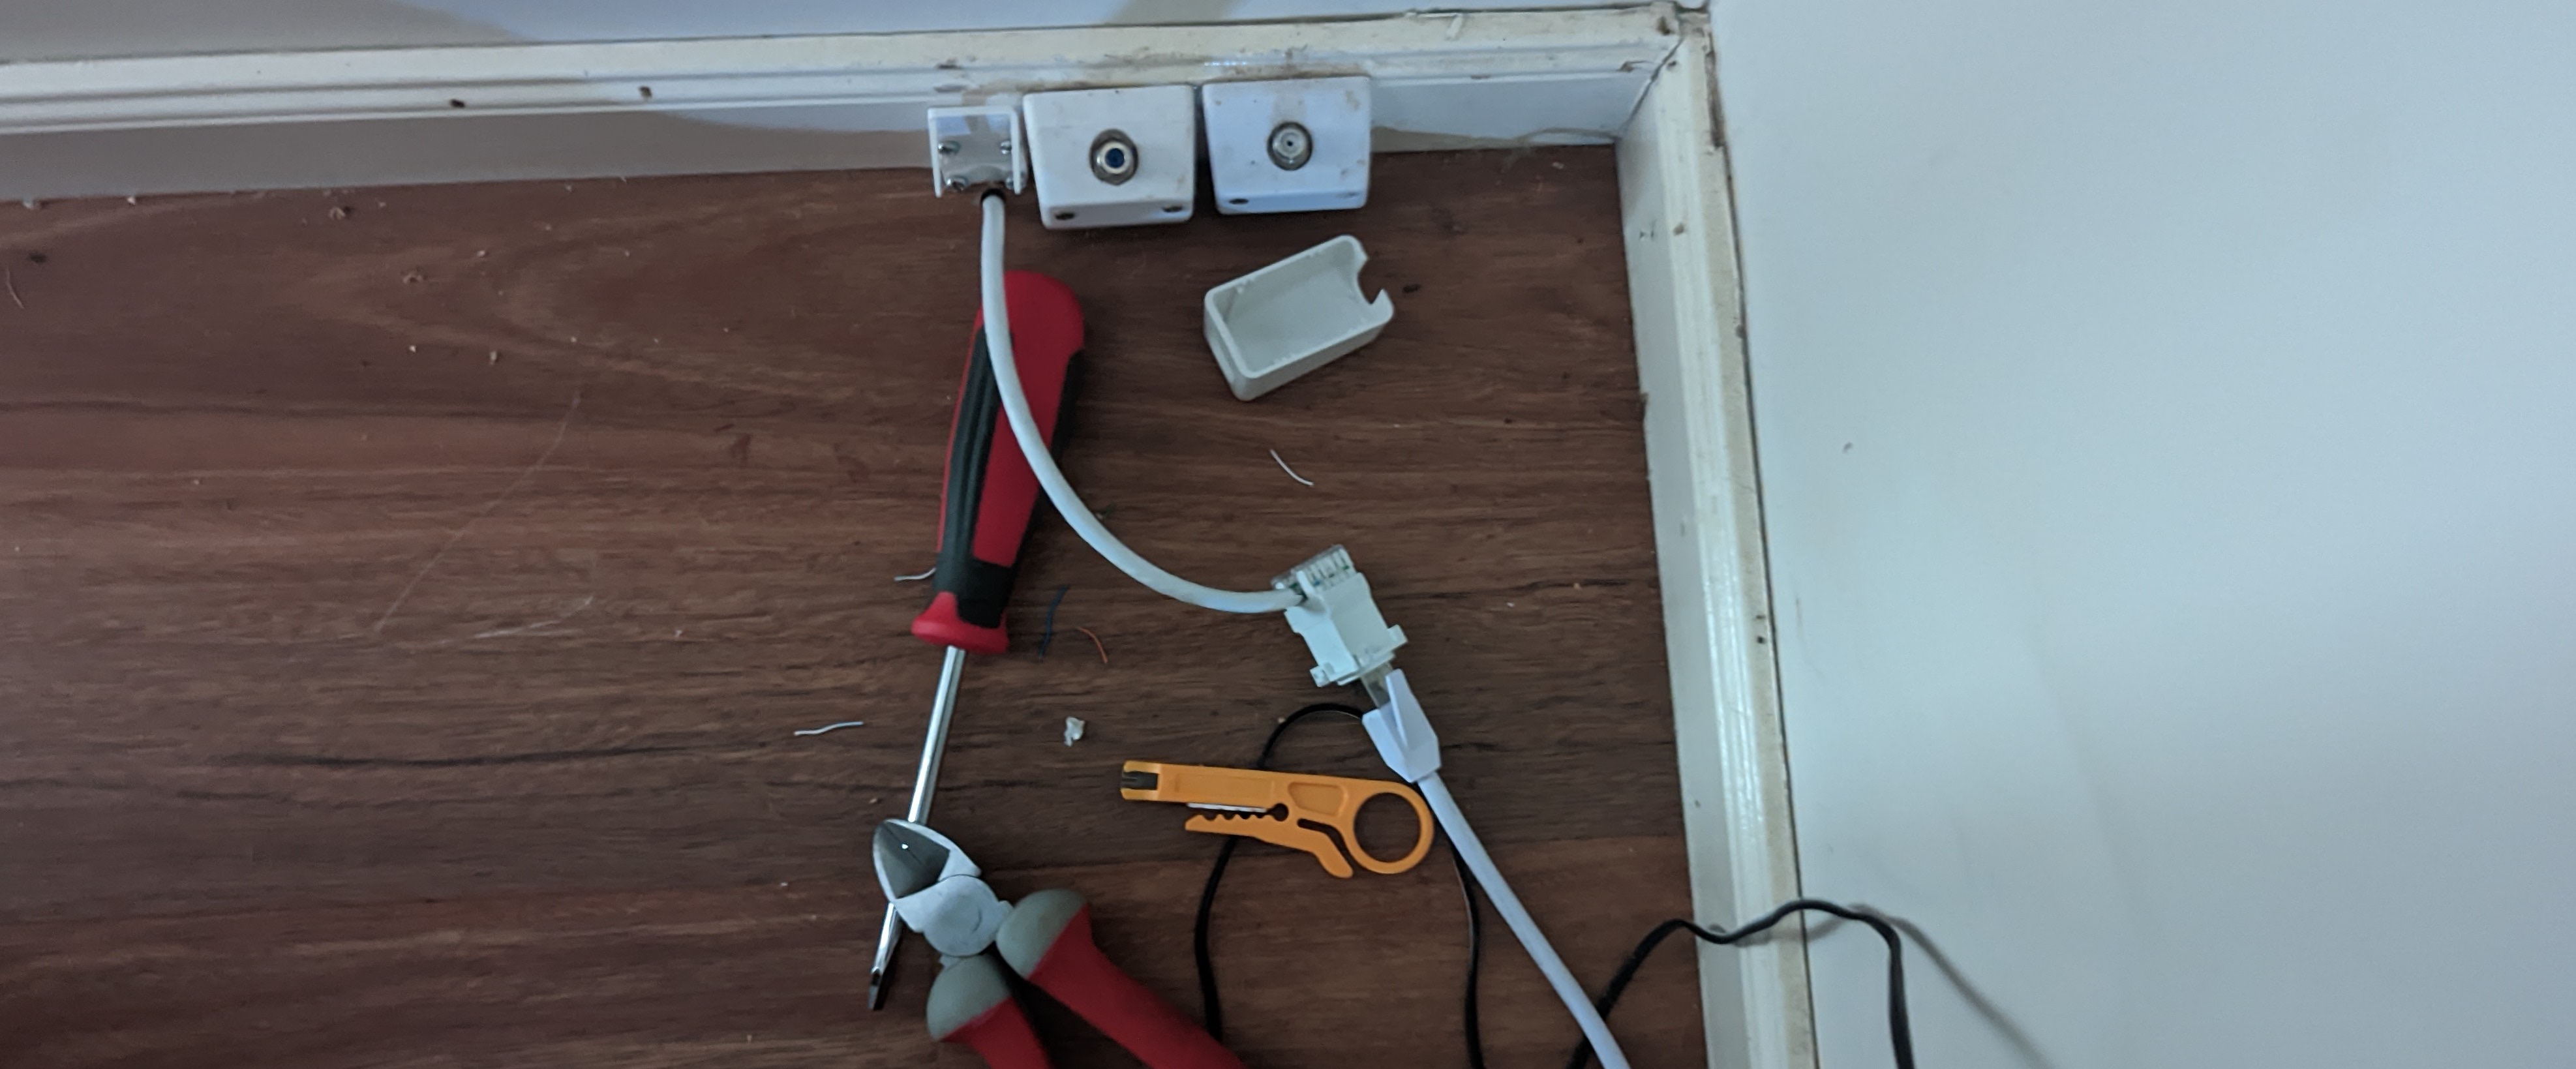
Under the house, the grey cable and the other end of the patch continued to use the RJ45 joiner. These are both placed in the Junction Box out of the way.
This allowed the POE power injector and my Nest router to be inside the house and protected from the weather.
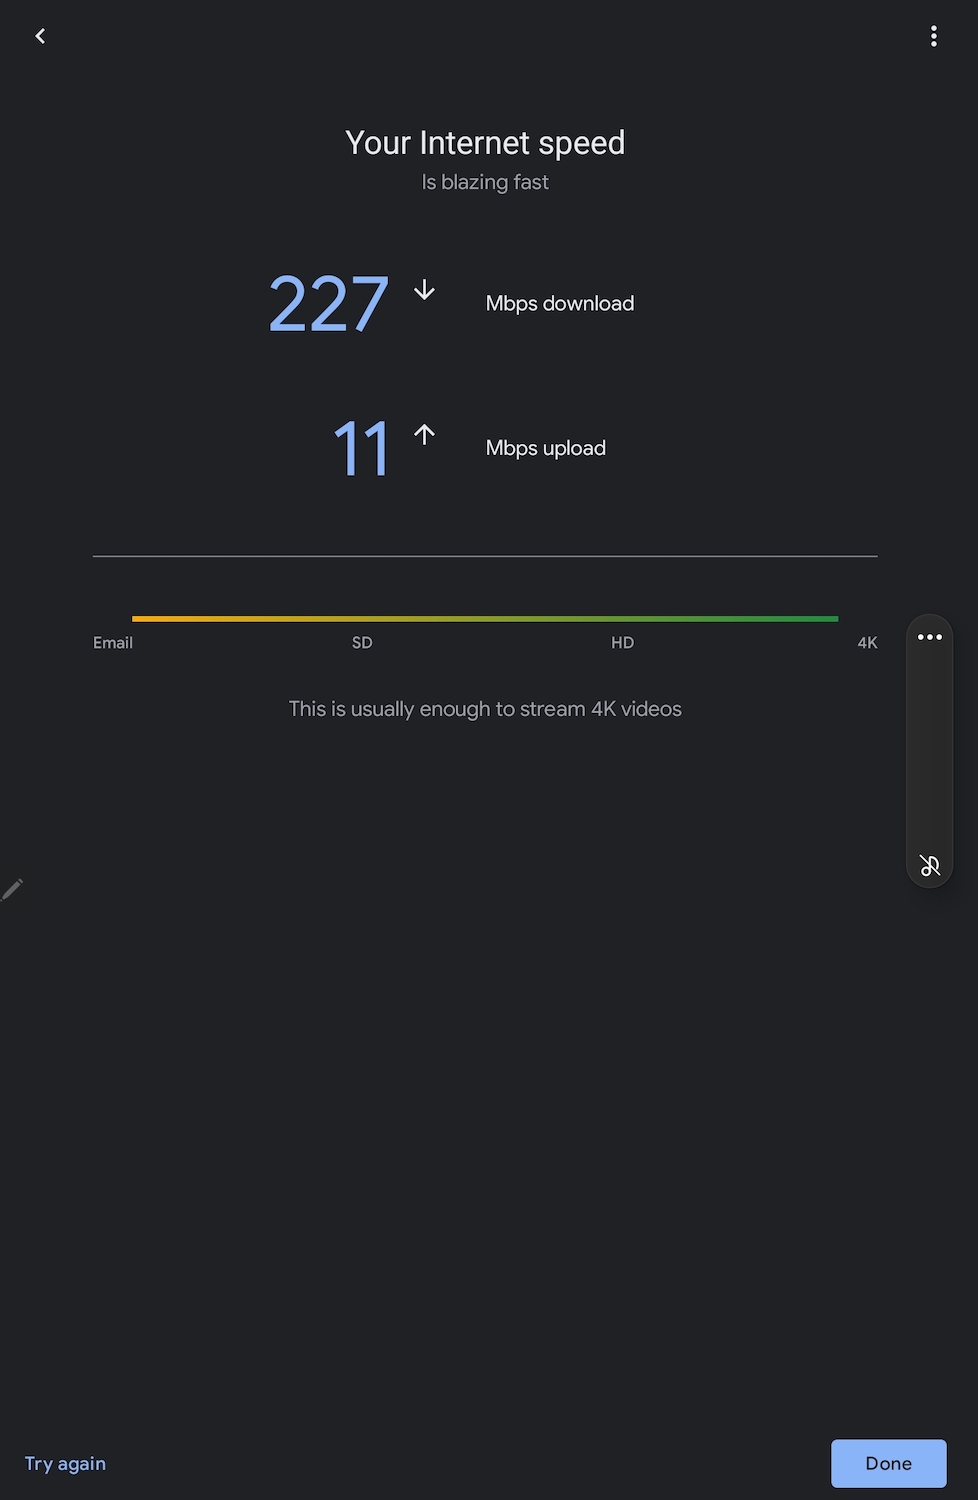
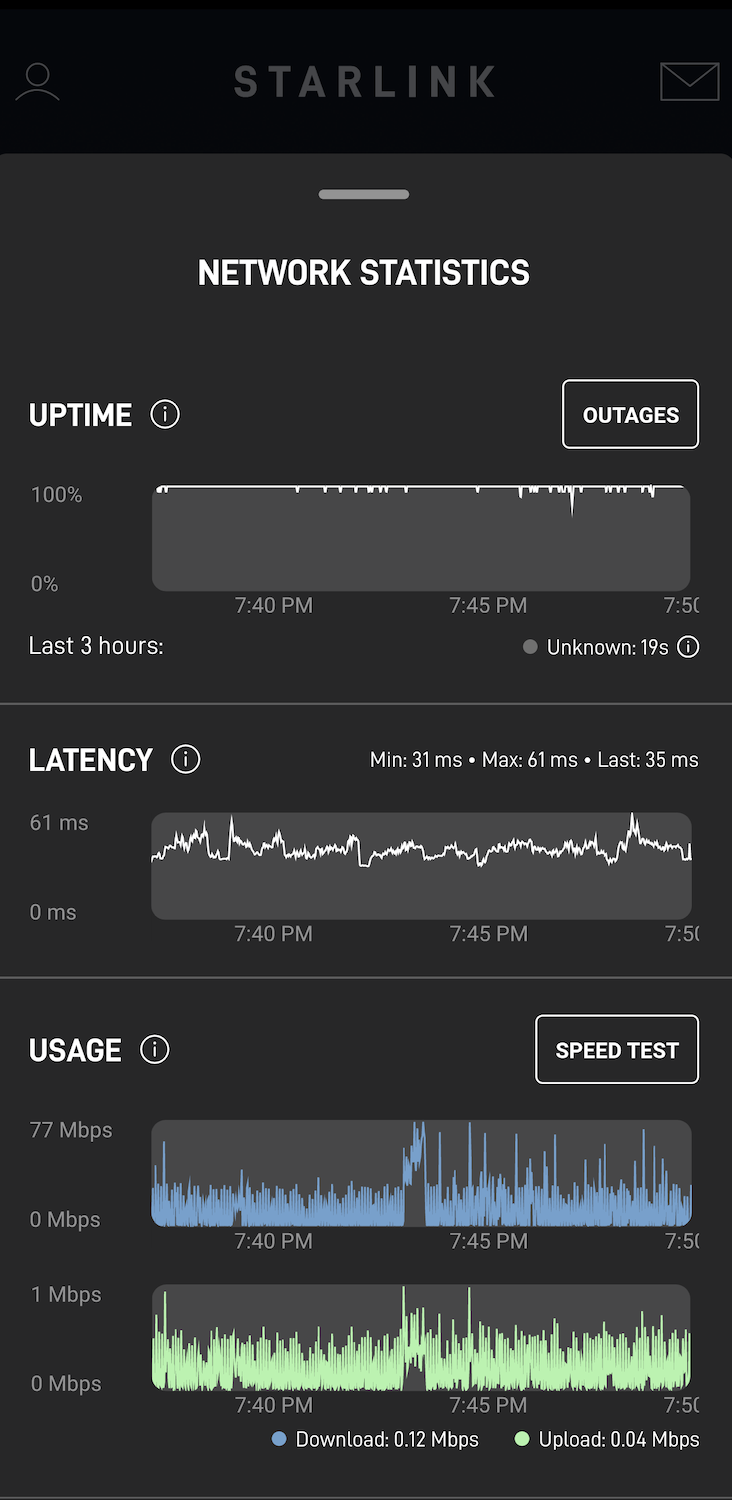
This solution worked, with speeds and latency similar to what we had seen the past couple of months when we were directly connecting the Dishy cable.
So to summarise this adventure you can use Cat6 to pass the Dishy v1 cable into the house for cheap. In the end, the cost for the solution was a total of $28 all from Bunnings. The list of components is here:
- 0.5m Cat6 Patch: $3.58
- RJ45 Connector: $10.04
- Architrave Cat6 RJ45 enclosure and Kyestone: $7.86
- Junction Box: $6.26
You may be able to get this price down cheaper by going online or to a trade centre.
The only change that I would look to make is to try to add the second keystone to remove the RJ45 connector and make it a little cleaner…… but if it ain’t broken don’t fix it.
Written on June 19, 2022